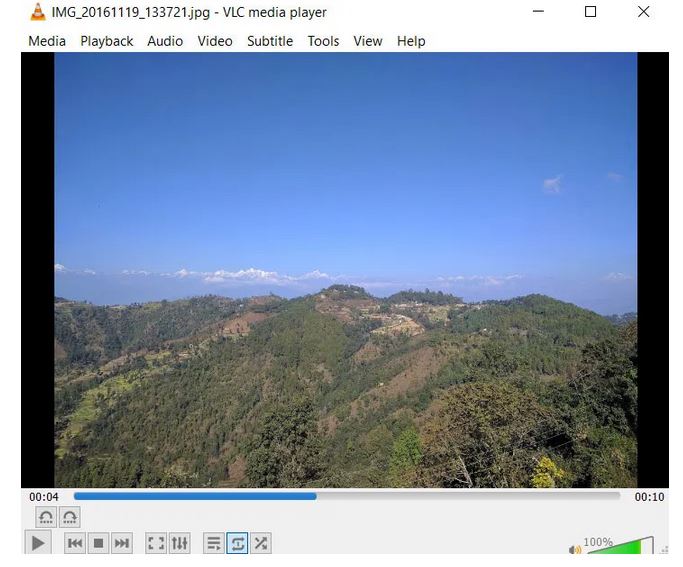
Not many are aware that the VLC Media Player is able to open photos. All you need to do is drag any of the JPG image to the VLC player and this can open easily in the application. This function is not limited to only a single image. Dragging multiple photos and dropping these can display all of these as a slide show. One image is given a screen time of 10 seconds. After which, the next one gets loaded and the slide shows continues. Once this has ended it might or might not loop depending on the setting. This is similar to a playlist of music but this is with photos.
The best way to make use of this is the ‘drag and drop’ method. You have the choice of dragging a single photo or with multiple photos directly to the interface of VLC or to the playlist (CTRL + L).
You need to know that folders with multiple photos cannot be dragged to the VLC player. You need to select the images manually inside the folder and then drop it. You need to select the individual files.
This means the player has jpg files.
You can also use the ‘Media > Open File (CTRL + O) method. This is used to open the photos inside the computer. Browse through the photos folder and find out what you want to open in the ‘Media’. In the right, from the drop down, choose the option that says ‘All Files (*)’ instead of ‘Media Files (*.3g2, *.3gp…)option.
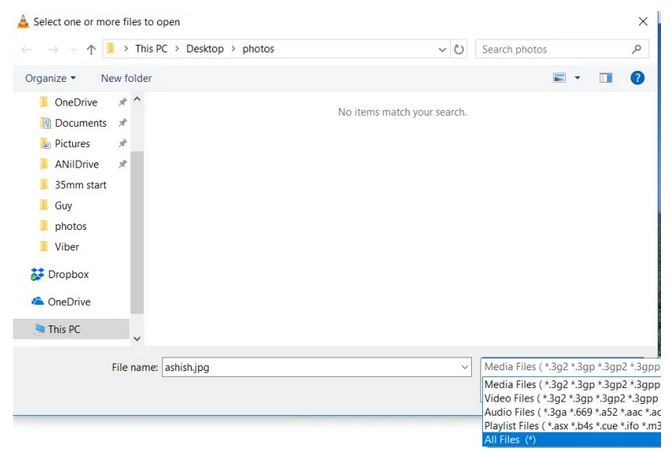
After this, all the files, even the .jpg files are displayed. You can select and then open. This is similar to opening a media file.
Changing the 10-second per photo limit
When you open a photo, it remains for 10 seconds on the screen. This happens even if you open multiple photos. The time on the screen is only 10 seconds. After the 10 seconds, the next photo is displayed on the screen. You can navigate the images with the ‘stop’, ‘play’ or ‘pause’ buttons.
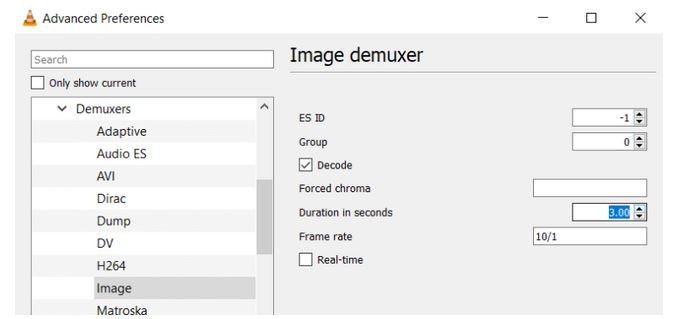
You can change these settings of 10 seconds to 3 seconds or probably, 20 seconds from the ‘advanced’ settings.
- Navigate to ‘Tool > Preferences’
- Click on ‘All’ to reveal the ‘Advanced Preferences’
- Navigate to ‘Input/Codecs >Demuxers > Image
- Change the value of the duration in seconds from 10.00 to whatever you want
- Click on ‘Save’
Now the photos on the slideshow of the VLC player display the number of seconds you have changed this to.
What Else can be done after Opening Photos?
You can do a lot of things to the images after you have opened photos on the VLC player. An image is a ‘single’ frame of any video. You can modify this using the options given for customization. You can apply the ‘video effects’ like adjusting the image contrast, rotate, and brightness and also overlaying logos or texts. You cannot use any audio effects on these.