
How to launch the app
To open Total HEIC Image Viewer, follow these steps:
- Press the Windows Start button on your keyboard or click the Windows icon at the bottom-left of the desktop.
- Type “Total HEIC Image Viewer” in the search bar.
- Identify and click the application entry with this icon
 from the suggestion list.
 - Wait for the app to finish loading and launching.
Once the app is open, you will see the Quick Launch Screen, from where you can easily view and/or convert HEIC images in just a few clicks.
The Quick Launch Screen
The Quick Launch Screen serves as the app’s gateway, offering quick access to various functionalities. It allows you to open new HEIC images, provides easy access to recently opened files, and offers links to the product help file.
Open HEIC images
From the Quick Launch Screen, there are two methods for opening HEIC images:
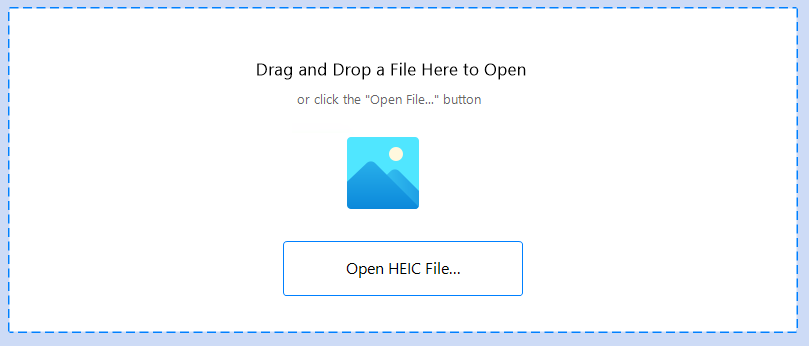
- Drag-n-drop: Simply drag an HEIC image file from Explorer to the designated drag-and-drop zone marked by dashed lines on the Quick Launch Screen.
- Open HEIC File button: Alternatively, use the “Open HEIC File…” button to browse and locate an HEIC image. Click the “Open” button to initiate the process.
In both cases, the selected HEIC image will be promptly displayed in the Viewer window.
HEIC image viewer
The HEIC image viewer window extends its support to a wide range of image and photo formats, not limited to the HEIC file format. Featuring a user-friendly interface, it allows you to effortlessly view your photos, inspect image details, and execute various image-specific functions.
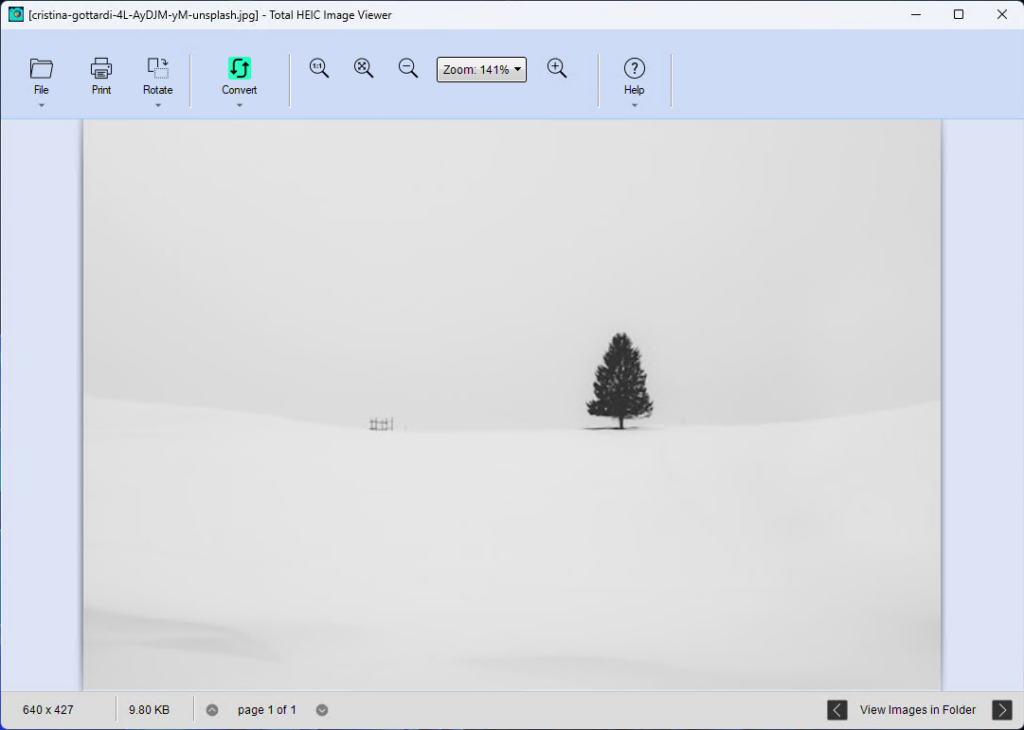
Viewing Images
In the Image Viewer, you have the flexibility to refine your image viewing experience. Load any image or photo file, and then adjust the zoom level to suit your preference. Easily navigate to other images within the same folder, or, if the image is in a multi-page format like TIFF, effortlessly flip through each page.
Multi-Page Image Navigation
For multi-page images, use the page control buttons, represented by chevrons on the toolbar, to navigate through different pages.
Image Folder Navigation
Effortlessly navigate through multiple images in the same folder without the need to repeatedly go through the Open File routine. After opening an image, use the left or right arrow keys on your keyboard to view images in sequence. Alternatively, you can utilize the “<” or “>” buttons located in the lower-right corner of the Image Viewer window to flip through the images.
Convert HEIC Images
The Image Conversion feature allows you to convert HEIC images to PNG, JPEG, GIF, and TIFF formats. You can access the conversion options by clicking the Convert button ![]() in the toolbar of the Image Viewer.
in the toolbar of the Image Viewer.
Convert a single image
To convert a single HEIC image, use the “Convert Image Files…” command. This allows you to convert the currently displayed image or select a different file for conversion.
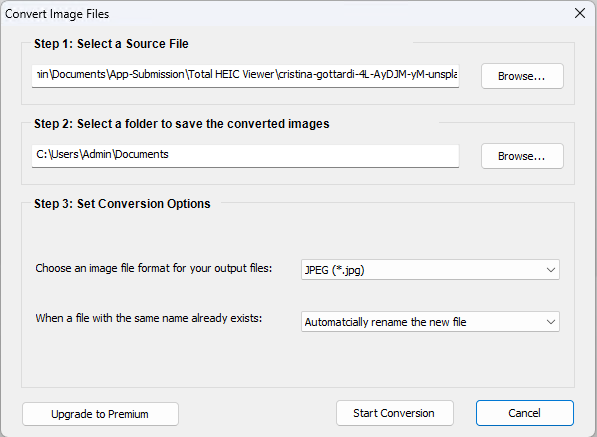
Before proceeding, review and confirm the following settings:
- Source File – Ensure the correct image is selected.
- Destination Folder – Choose where to save the converted file.
- Conversion Options – Specify the desired output format (PNG, JPEG, GIF, or TIFF) and adjust any available settings.
Batch Conversion
Use the “Batch Convert Image Files…” feature to convert multiple HEIC images from a folder at once. The settings are similar to single-image conversion, with one key difference—ensure you select the source folder containing all the images to be converted. The remaining settings, including the destination folder and output format, follow the same process as single-image conversion.